4th Axis Setup
Installation and cutting information for using the 4th axis Rotary with Planet CNC on a Spark Robotic RTR Router
Note before install: Some early customers may receive their Rotary 4th axis with a new control box. please set up the new control box to switch out with their original first before the 4th axis installation.
To do this
1) Mount your new control box and plug in all the wiring harness connectors, power cord, and USB cable.
2) Turn on your control box and Planet CNC Software on your laptop. Get your new license activation code that was emailed to you. if you did not receive it, email us and we will send it to you.
3) In the email that was sent to you with your license, highlight the license code, right click on it, and select 'COPY". In planet cnc goto HELP -> LICENSE MANAGEMENT -> LICENSES -> click the IMPORT button. your license should auto-populate this section.
4) Click on the SETTINGS -> CONNECTION -> double click the new license in the center box (it should be under the 'simulation' option). It should populate the PRIMARY CONTROLLER field. Click OK and turn off the Planet CNC software and turn it back on.
5) Make sure you have one or two green dots in the lower left hand corner to indicate your control is communicating with the laptop/ software. jog the table around with the keyboard buttons (left/right = X Up/Down = Y Page up / Page Down = Z) to make sure everything is working properly.
The profile loaded on the new control boxes is our most up to date control box but it is based on generic inputs/outputs so some axis might need to be reassigned (as in commanding the x to move might move the z axis) or inverted (as in commanding the x to move right makes it move left). If any of this is the case, contact us and we'll get your settings sorted out.
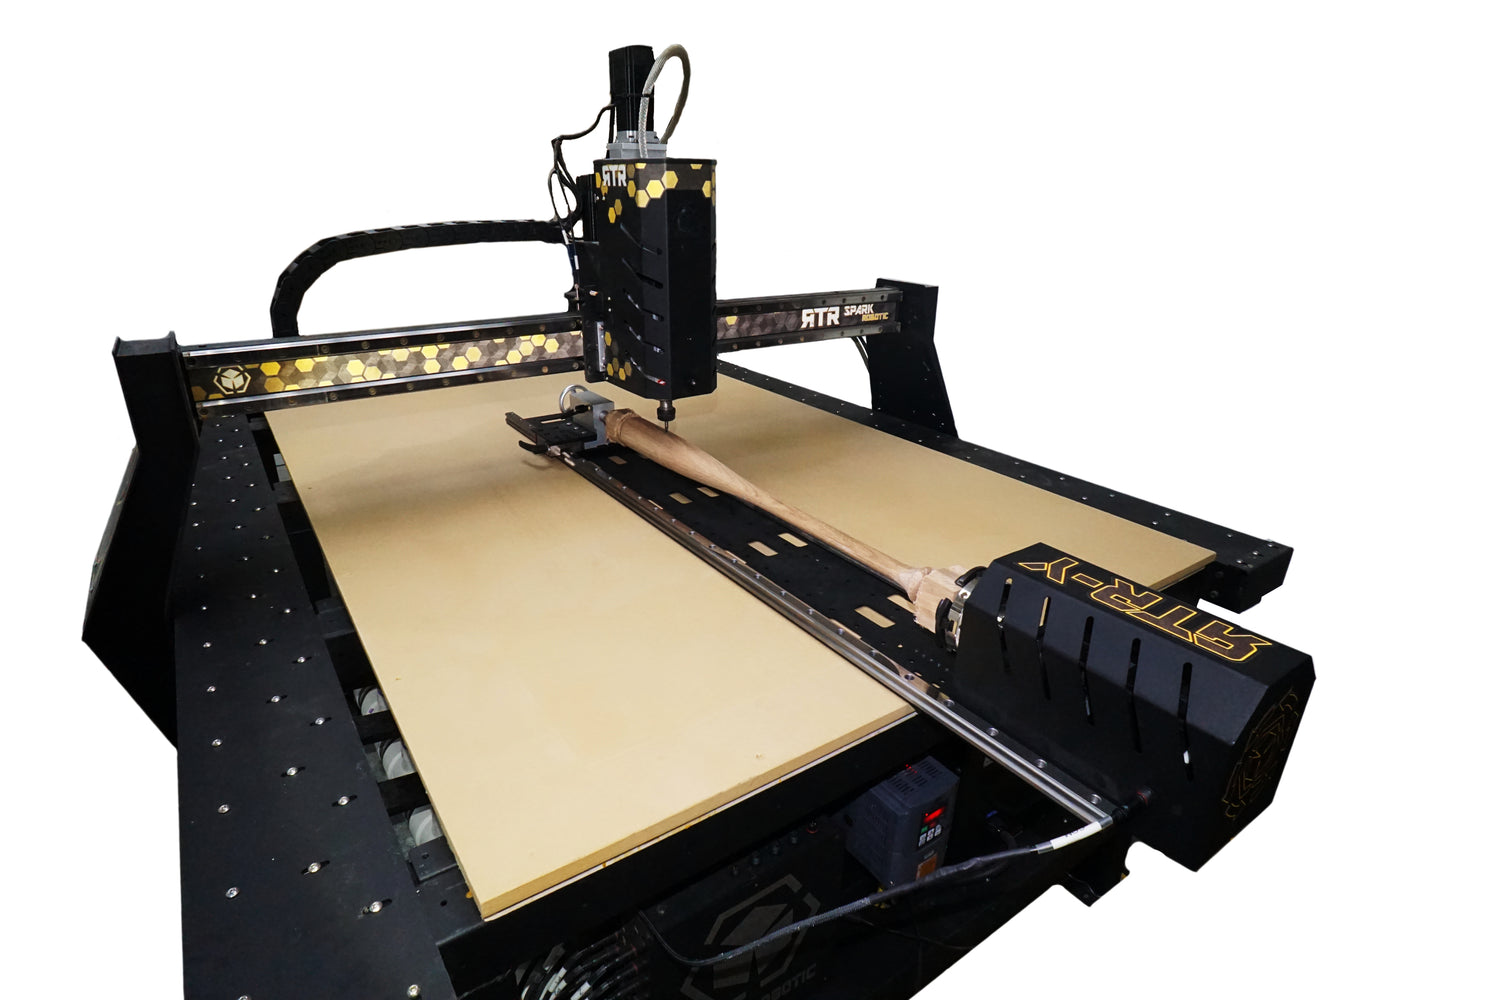
4th Axis Installation Procedure
-

Step 1
Mount the 4th axis onto the table. The 4th axis has some weight to it so you may need a second person to lift in onto the table.
-
Step 2
You can use the spindle, moving it forward and backward along the Y axis, to assure your 4th axis is aligned with the Y axis.
-
Step 3
Make sure your 4th axis is plugged into the axis itself (on the rear cover) and into the control box.
-
Step 4
Make sure your control box is turned on and connected. Try jogging your A axis and see if your rotary spins.
-
Step 5
Watch videos on how to program g-code in Vectric for the 4th axis. Video links and post processor downloads are available below.

4th Axis Vectic Post Processor
Install the post processor in V cavre pro / Aspire.